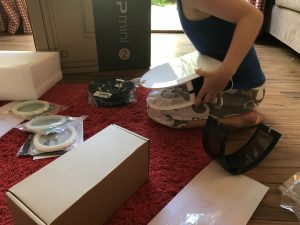
This year, in 2017, there will be a new Up Mini2 3D printer in each of Yr 4, Yr 5 and Yr 6 year levels.
Last year, as a result of a few projects it became clear that 3D printing has an important role to play in our school.
These projects included:
- workshops in our Young Innovator Program,
- curriculum units in several year levels
- students in Yr 4 and 5 working within our Library Makerspace and
- Yr 5 supporting our Rosie’s Appeal which involved some entrepreneurial possibilities related to 3D printing,
To support some of these projects – students wrote blogs about their work:
Additionally, as a school implementing the Digital Technologies Curriculum, it has been impressive to note the part that 3D printing can play in supporting students to develop the mindset of a computational thinker. When we look at this image from Barefoot Computing – all of the approaches can be supported with the use of 3D printing – Tinkering, Creating, Debugging, Persevering and Collaborating.
These new Up Mini2 3D printers have a number of advantages for our learners:
- Easy to set up (we had one working within half an hour of unboxing)
- Can be managed over the WiFi
- Can be managed using the new app ‘Up Studio’ from the teacher’s iPad
- Can be managed from laptops using the UP Studio software
- Touchscreen which allows the user to see the progress of the print
- Portable – can be paused within a print job, turned off, taken somewhere else and that print job resumed
Key tips for our teachers:
- Utilise the student expertise in your rooms and year levels
- Have fun and take a risk – making mistakes with 3D printing is an important part of the learning journey.
- Use this opportunity to model risk taking and resilience to your students
- See this as another tool in your toolkit which supports you to differentiate for your learners (see this post on coding)
- The only thing that concerns me about the students managing this whole 3D printing process is getting the print job off the plate – this requires quite a lot of scraping. We have found it is best to do this when the model is still warm.
Here are links to the apps and software to manage the printers wirelessly from your room:
The links for the apps to put on the teacher iPad – UPStudio
Windows Software UP Studio
Mac UP Studio
Creating and Printing from iPads:
I’ve had the usual problems with trying to work out what combination of apps and what work-flow is going to work best in our managed WiFi environment at Oakleigh in which we use BYO iPads and shared iPads as well as laptops. Some apps, for example, export only with email (which we don’t use on shared devices) and others export only to cloud storage which we don’t necessarily have easy access to. If only all apps allowed ‘open in’ and we were able to open the stl file in the UP Studio app – I would be very happy! Otherwise, if UP printers made a student friendly design and creation app – that would be filling a real void also. Here are my suggestions for now:
Browser Based
Thingiverse – access via your browser and select ‘Open in’ and select Up Studio.
TinkerCAD – access via your browser and select ‘Open in’ and select Up Studio.
Apps
Morphi – will email from the device it was created on but the device receiving (with the UP Studio on it) will have to have a Zip extractor app on it.
Gravity Sketch – as above but extracts to an obj
Cubify Draw – will let you email the design and then on the UP Studio iPad, you ‘Open in’ the Studio app.
As far as I can see – all the AutoDesk apps force you to upload to their cloud.
Software to play with for our more sophisticated users:
(I’m still grappling with a doll with joints that move using a combination of the above two pieces of software)


